Committing and pushing code to GitHub
Learn how to save your work and upload it to GitHub via the terminal and using VS Code’s built-in Git tools.
- Saving your work
- Understanding the Workflow
- Method 1: Using VS Code’s Source Control
- Method 2: Using the Terminal
- Lesson workflow
- Troubleshooting
- Quick reference
- Learn more
Saving your work
While working on any sizeable coding project, you should save your work periodically to avoid losing it and to keep track of what you have changed. There are two places your code should be saved:
-
Locally (on your computer) - so you don’t lose your changes if VS Code closes. You can use [
Ctrl+S] (Windows) or [Cmd+S] (Mac) as you would do normally when saving files in other applications. -
On GitHub (in the cloud, like google drive) - so you can:
- Access your code from any computer
- Keep a backup of your work
- Track changes over time
- Share your code with others
Understanding the Git workflow
Every time you want to save your work to GitHub, you will need to enact the following steps:
- Stage the files you want to save. You can specify
- A specifiic file:
git add file1.py - A list of files, which:
git add file1.py file2.py file3.pyor if some files are kept in subfoldersgit add file1.py folderX/file2.py - All the files in the project folder:
git add .(the.stands for all files)
- A specifiic file:
- Commit a snapshot of your changes with a message describing what the snapshot contains:
git commit -m "Your message"
- Push (upload) your commits to GitHub:
git pushuploads the files to the your repository on GitHub.
The three essential Git commands
git add
The git add command “stages” files, i.e. marks them as the ones to be committed and uploaded to your GitHub repository.
To add everything, use the period . symbol:
$ git add .The period
.means everything in the folder.
You can also add individual files or directories, e.g.
$ git add file1.pyMake sure you leave a space between
addand..
If the file is in a subfolder, you need to specify this explicitly:
$ git add folder1/file1.py
If you want to add the entire folder, use the * symbol:
$ git add git add folder1/*
If you want to specify a list of files, you can either add them individually with separate commands:
$ git add file1.py
$ git add file2.py
$ git add file3.py
or simply add them in a single command:
$ git add file1.py file2.py file3.py`$ git add folderX/fileA.py folderX/fileB.py folderY/fileyC
git commit
The git commit command saves the snapshot with a message which you provide. It is good practice to make the messages descriptive so you can easily refer back to them and know what the snapshot contained. In industry, commits are often associated with single features. By making the messages clear and descriptive you know which commits are responsible for which features and where to roll back to if you need to.
$ git commit -m "Add interactive options to menu"The
-mflag stands for “message”. If you don’t use the-mflag, your text editor will open and you will be asked to write the message there, save it and close before the next step.
Examples of good commit messages:
"Add greeting function"
"Fix bug in name input"
"Update README with setup instructions"
"Complete Lesson 0 exercises"
Examples of bad commit messages:
"update"
"fixed stuff"
"asdfgh"
"commit"
git push
The git push command uploads the commits to your GitHub repository. More specifically, it uploads them to a specific branch.
Branches are different versions of your project that you can work on separately and merge back to a main branch (in the same way you might write different endings to a book and choose one to merge back to the main text to be published).
In this course, you can assume that you are working on a single branch, the main branch, and that you will continue working on this branch (this is the default branch and is created automatically when you create the project). If you are interested, you can learn more about branches and branching in the additional resources
$ git pushThis pushes your commits to the branch you are working on.
You can also specify the branch you want to push to explicitly. For now, you will only be pushing to the main branch so the command you use is:
$ git push origin main
git push= the command to uploadorigin= the remote repository (your GitHub repo)main= the branch you’re pushing to
Method 1: Using VS Code’s source control
With this method, you don’t need to type the commands above but they will help you to understand what the steps outlined below are for.
Step 1: Save changes to your code
Save the files you have edited with [Ctrl+S] (Windows/Linux) or [Cmd+S] (Mac), as you would normally when saving files on your computer.
Step 2: Open Source Control
1) Click the Source Control icon in the left sidebar (looks like a branching diagram).
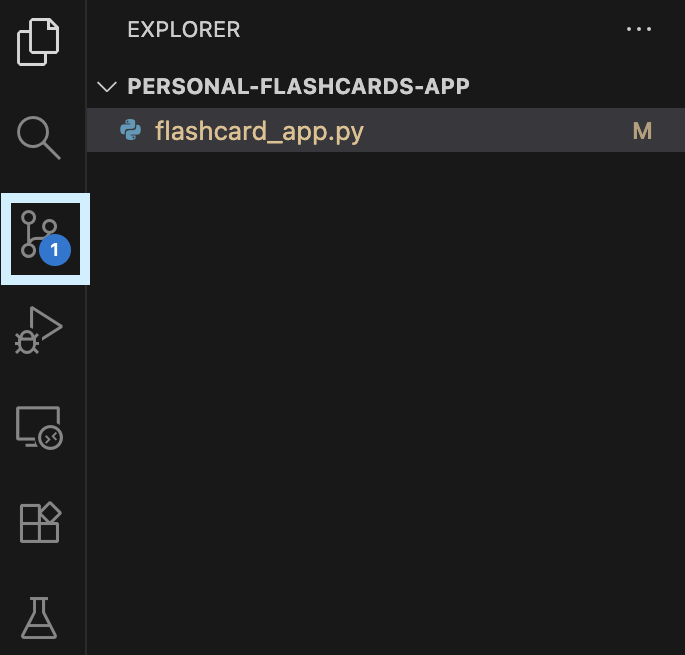
Or press [Ctrl+Shift+G] (Windows/Linux) or [Cmd+Shift+G] (Mac)
2) You’ll see a list of changed files with a number badge
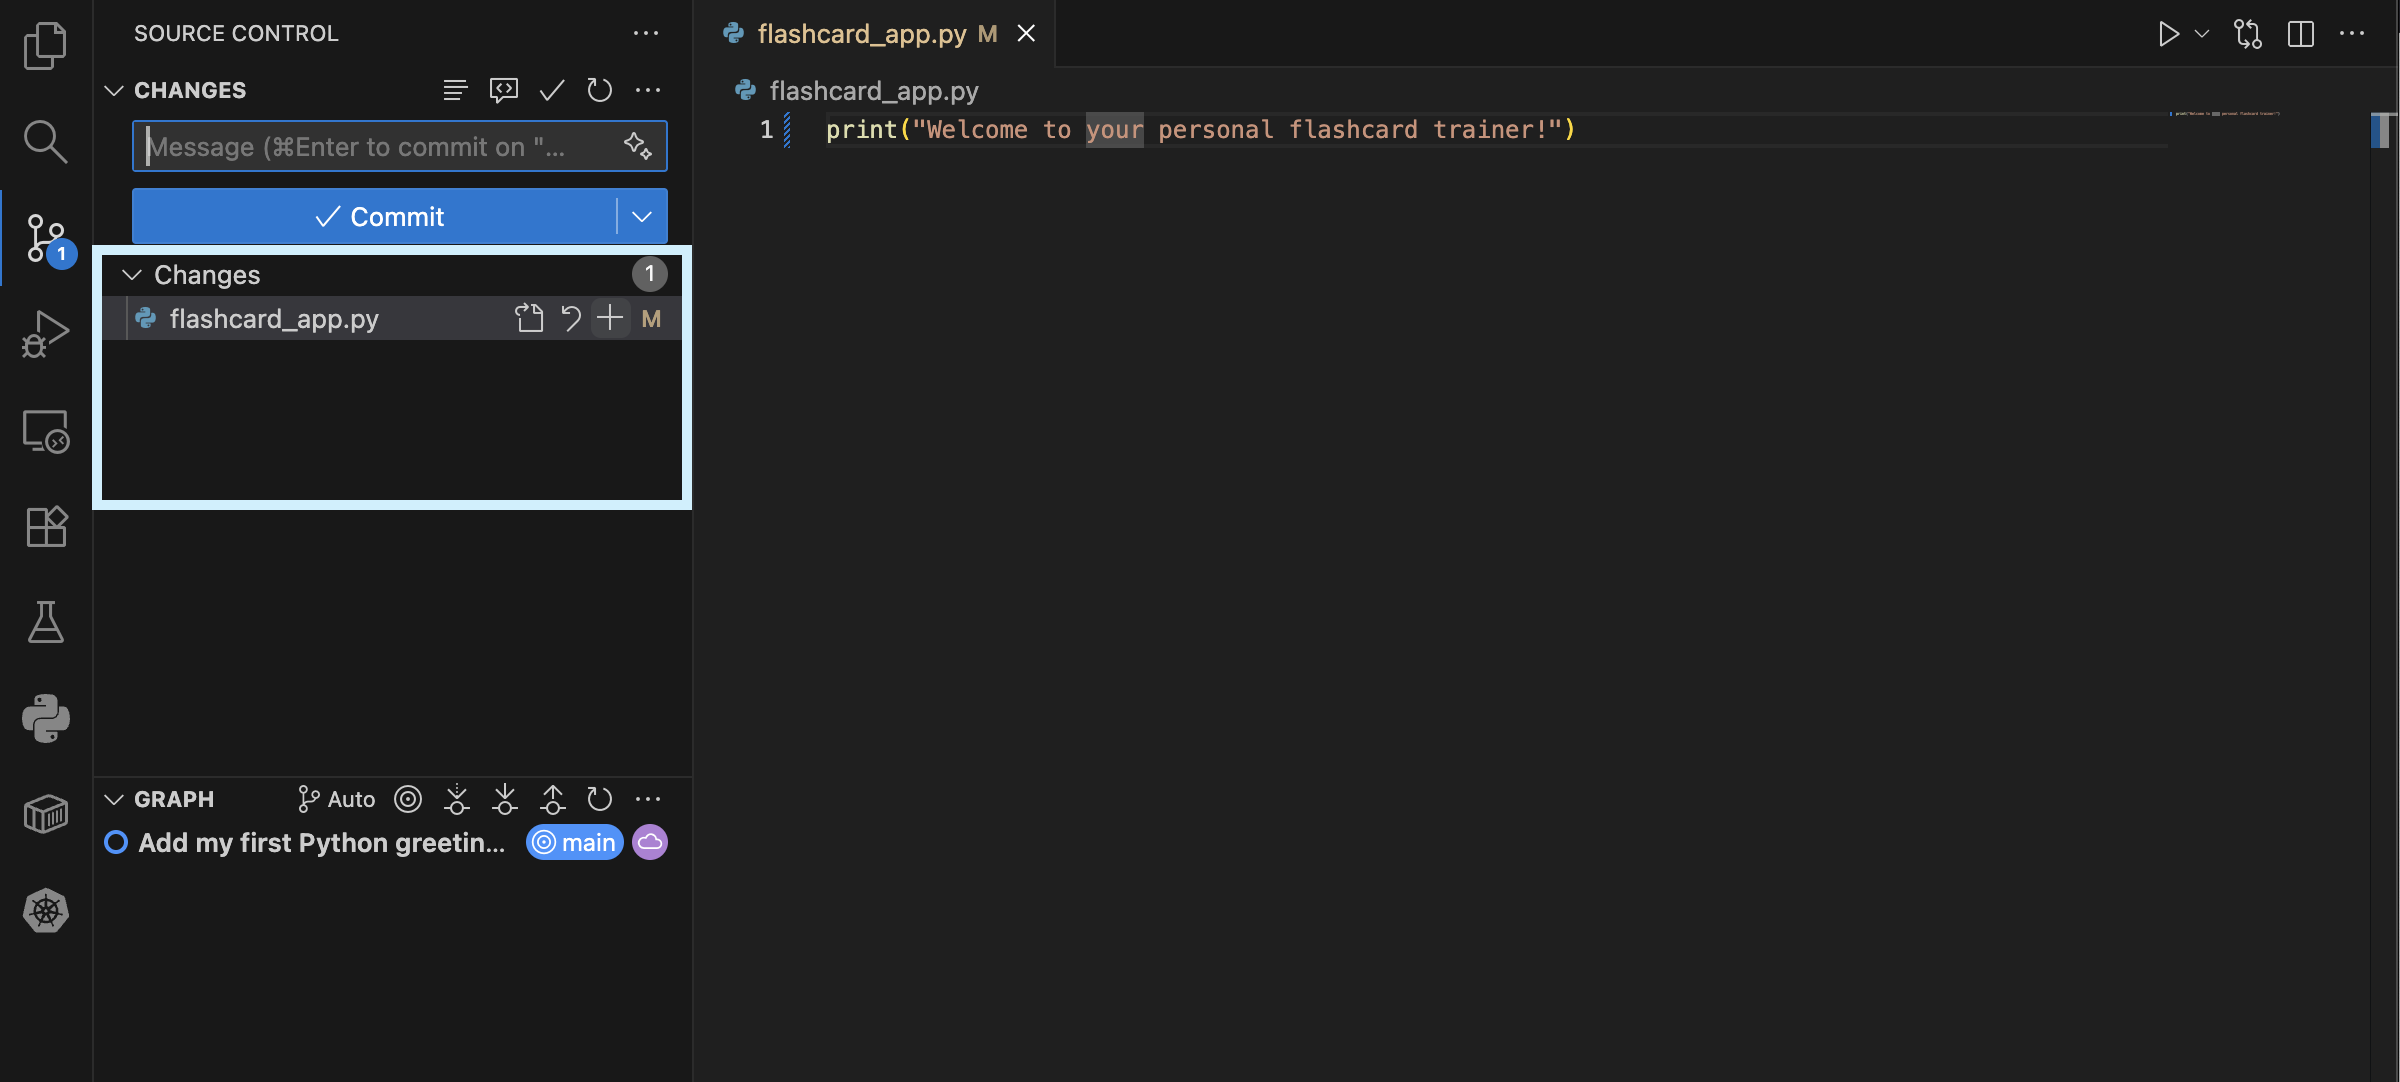
Step 3: Stage your changes
“Staging” means selecting which changes you want to include in your commit and upload to your GitHub repository. In the terminal, you would use the git add command for this step.
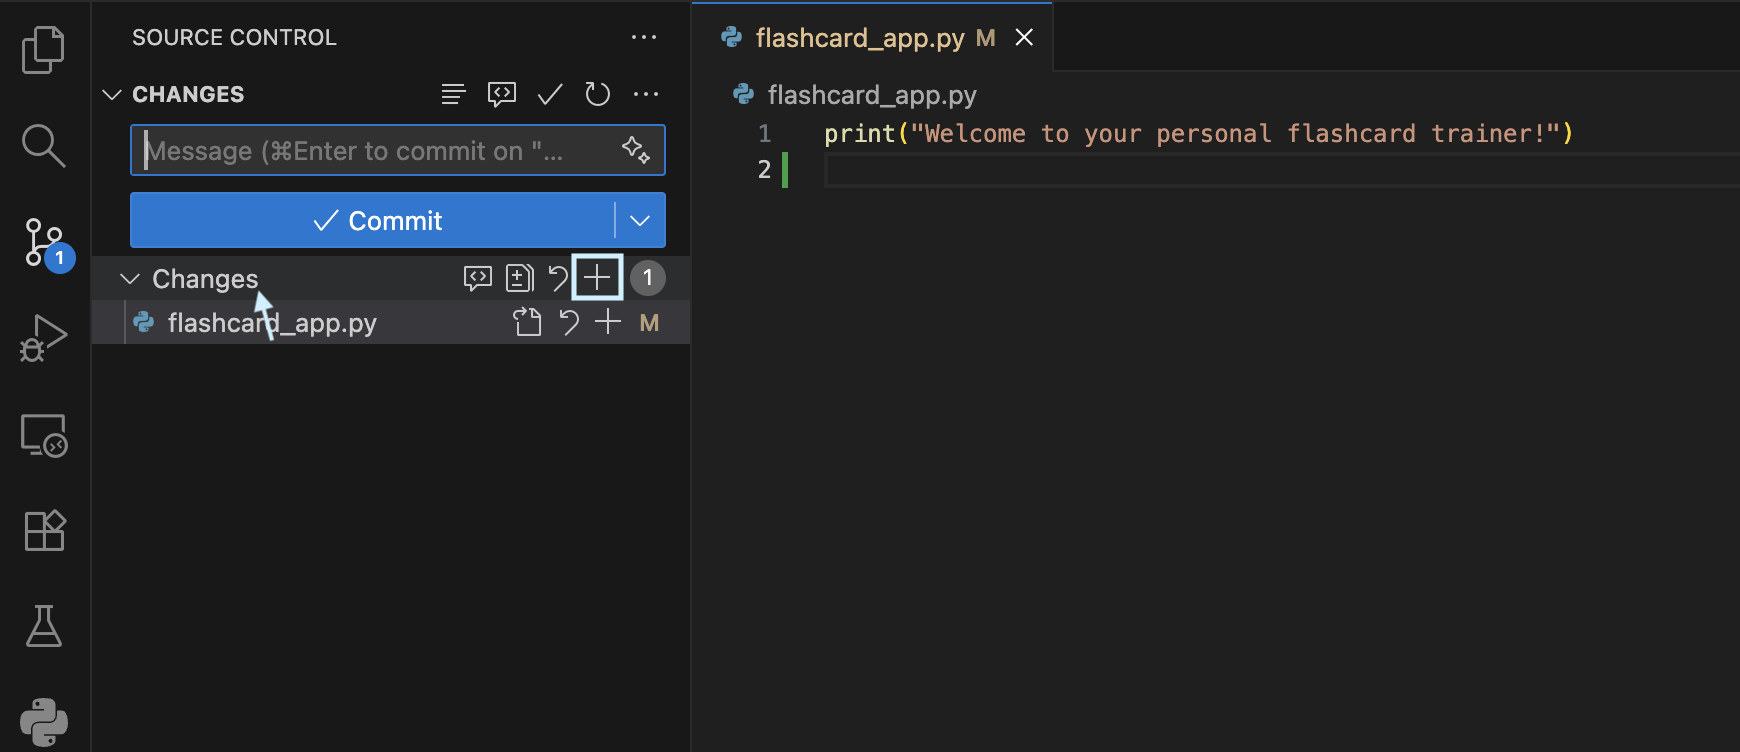
Option A: Stage all files
This is the same as the command git add .
- Hover over “Changes” and click the + button which becomes visible.
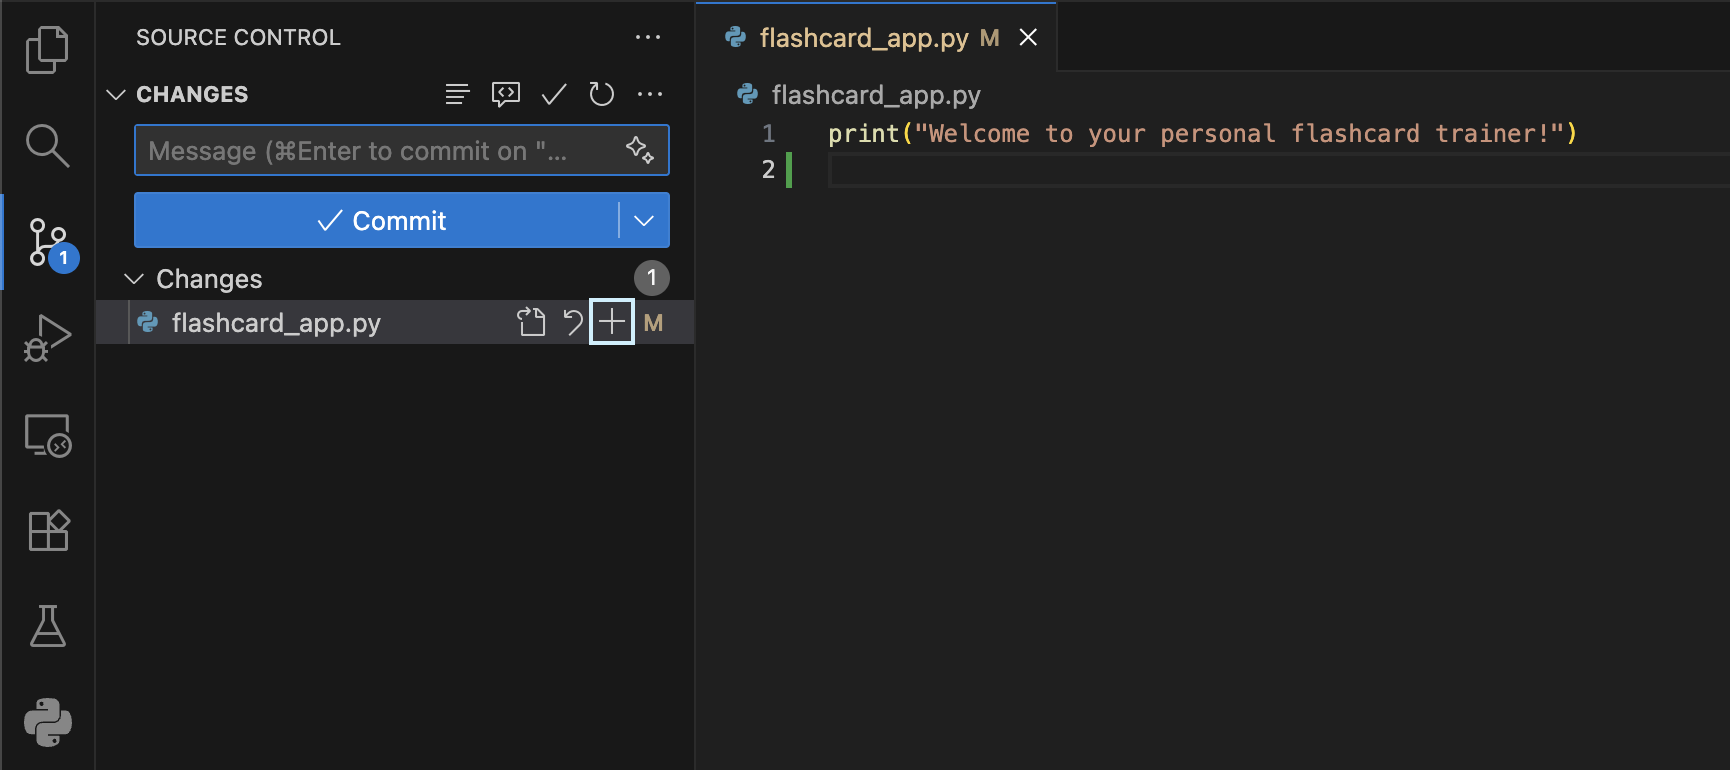
Option B: Stage specific filess
- Hover over a file and click the + button next to it
Step 4: Commit with a message
1) In the text box at the top, type a descriptive message about what you changed:
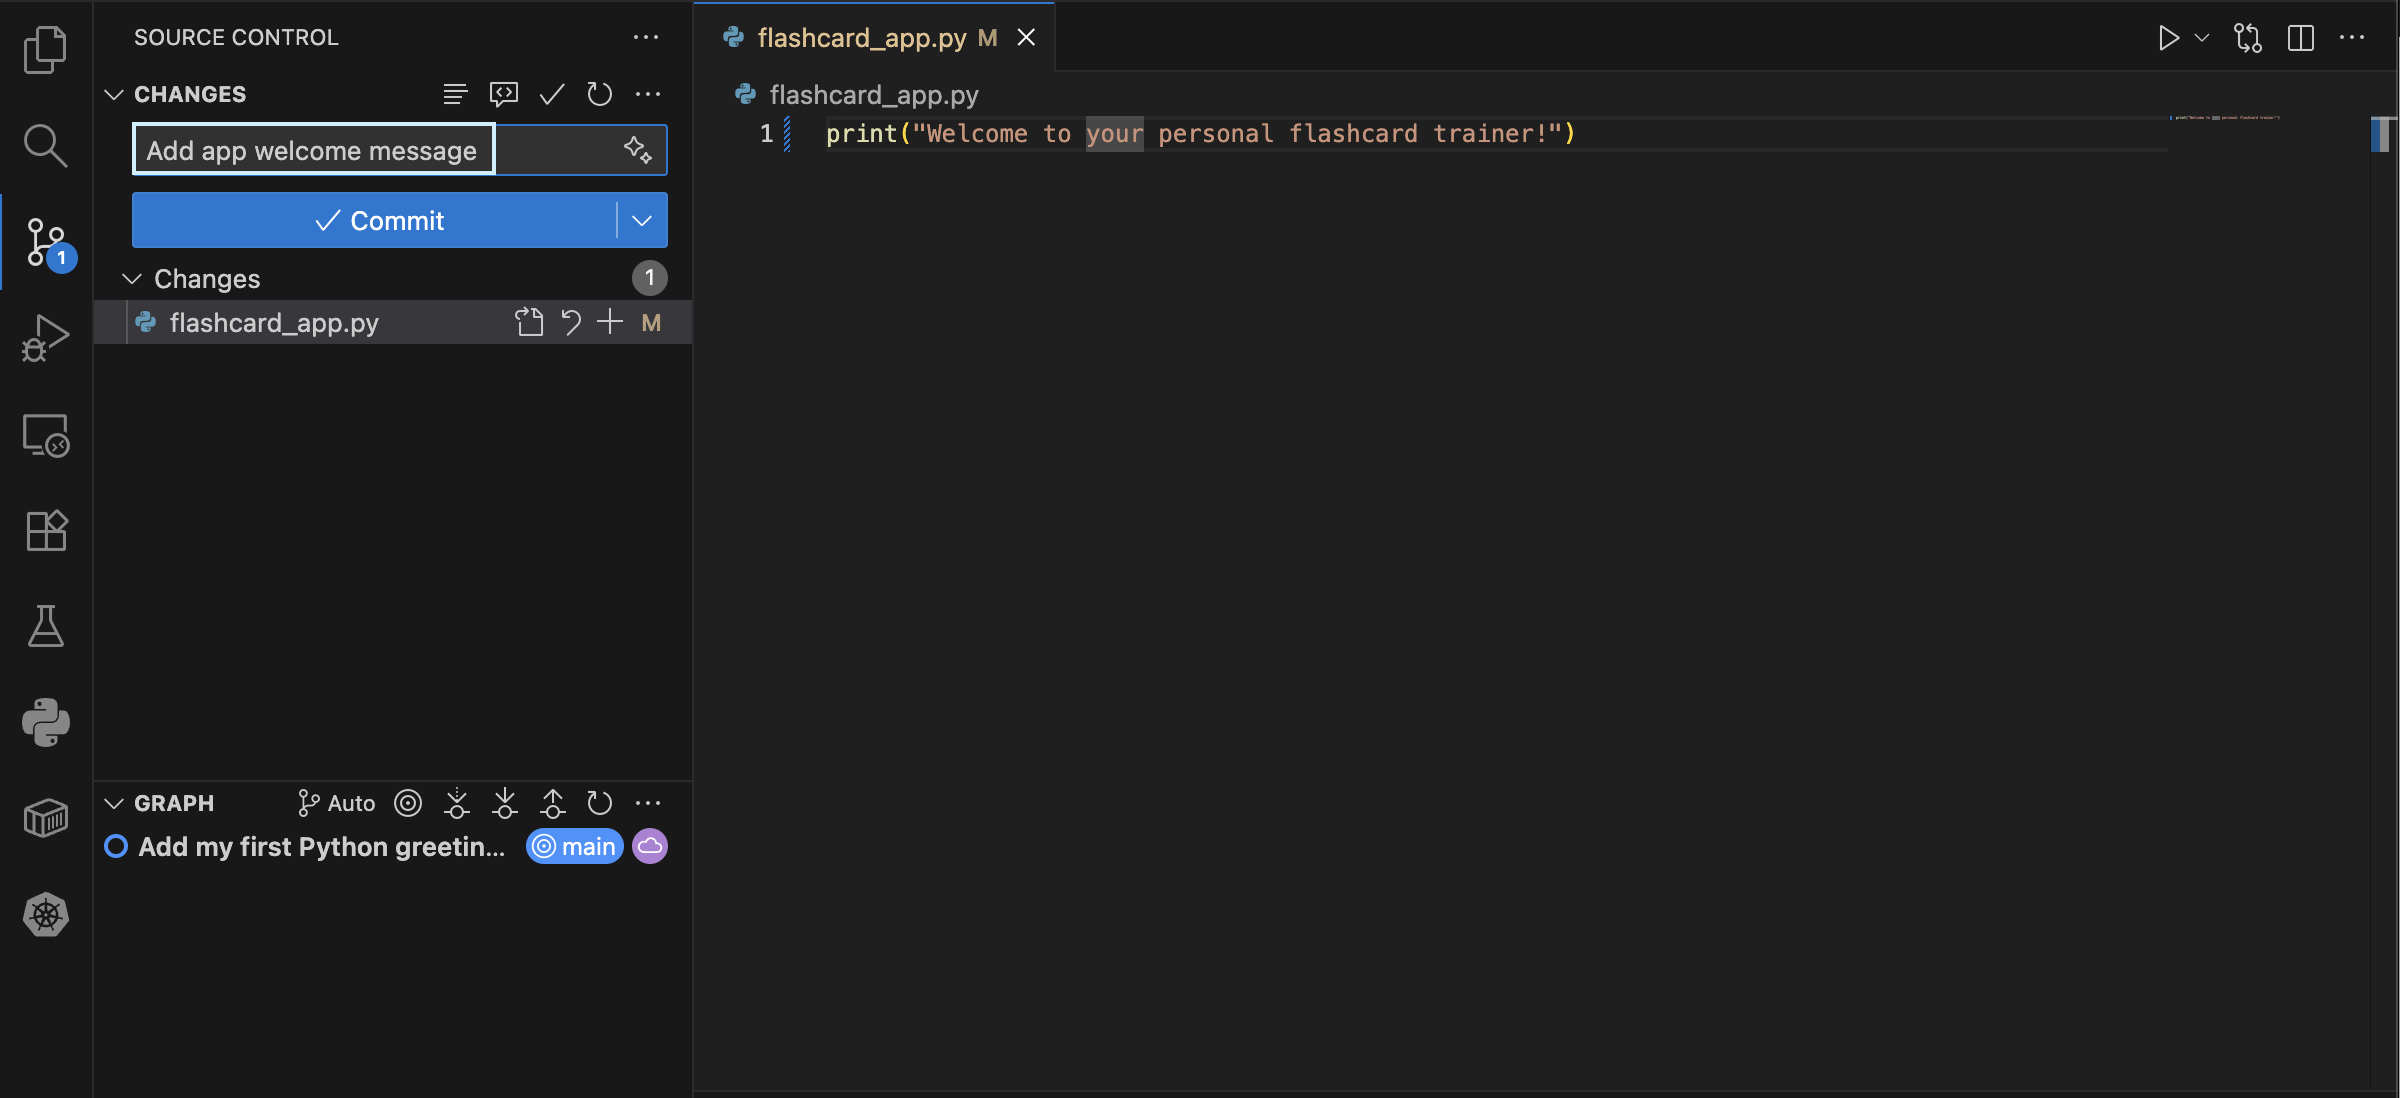
2) Click on the blue [Commit] button or use [Ctrl+Enter] (Windows/Linux) or Cmd+Enter (Mac) to commit

If you try to commit but but have forgotten to add files to stage explicitly, you may get an additional message after you click [Commit] that asks you if you want to stage them all. Simply say yes if you want to commit all the files in the project folder. Otherwise, add the files explicity as described above.

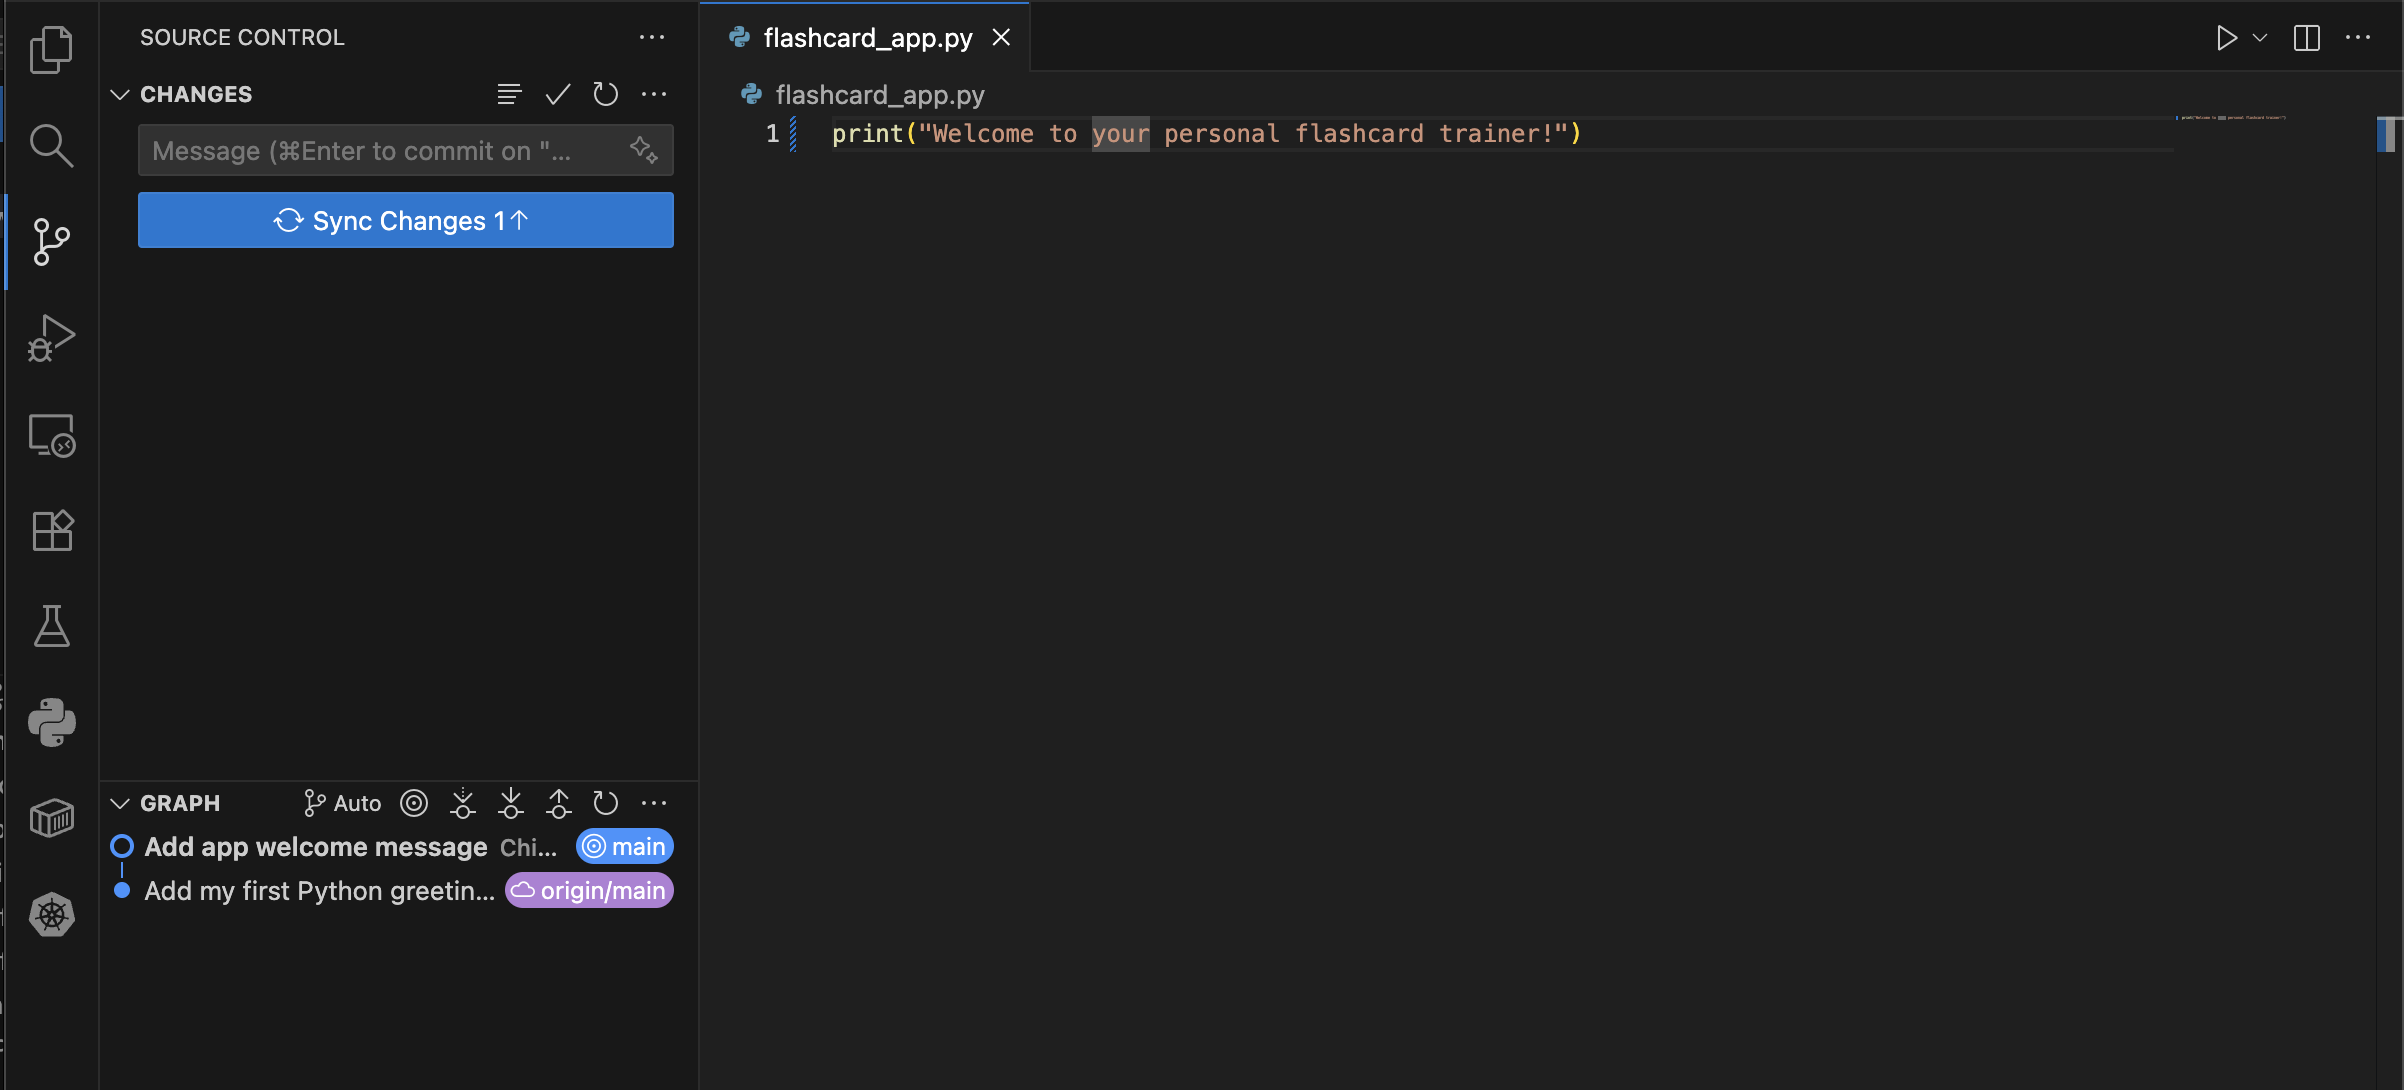
Step 5: Push to GitHub
Click on the blue [Sync Changes] button
Confirm any pop-up dialogues.
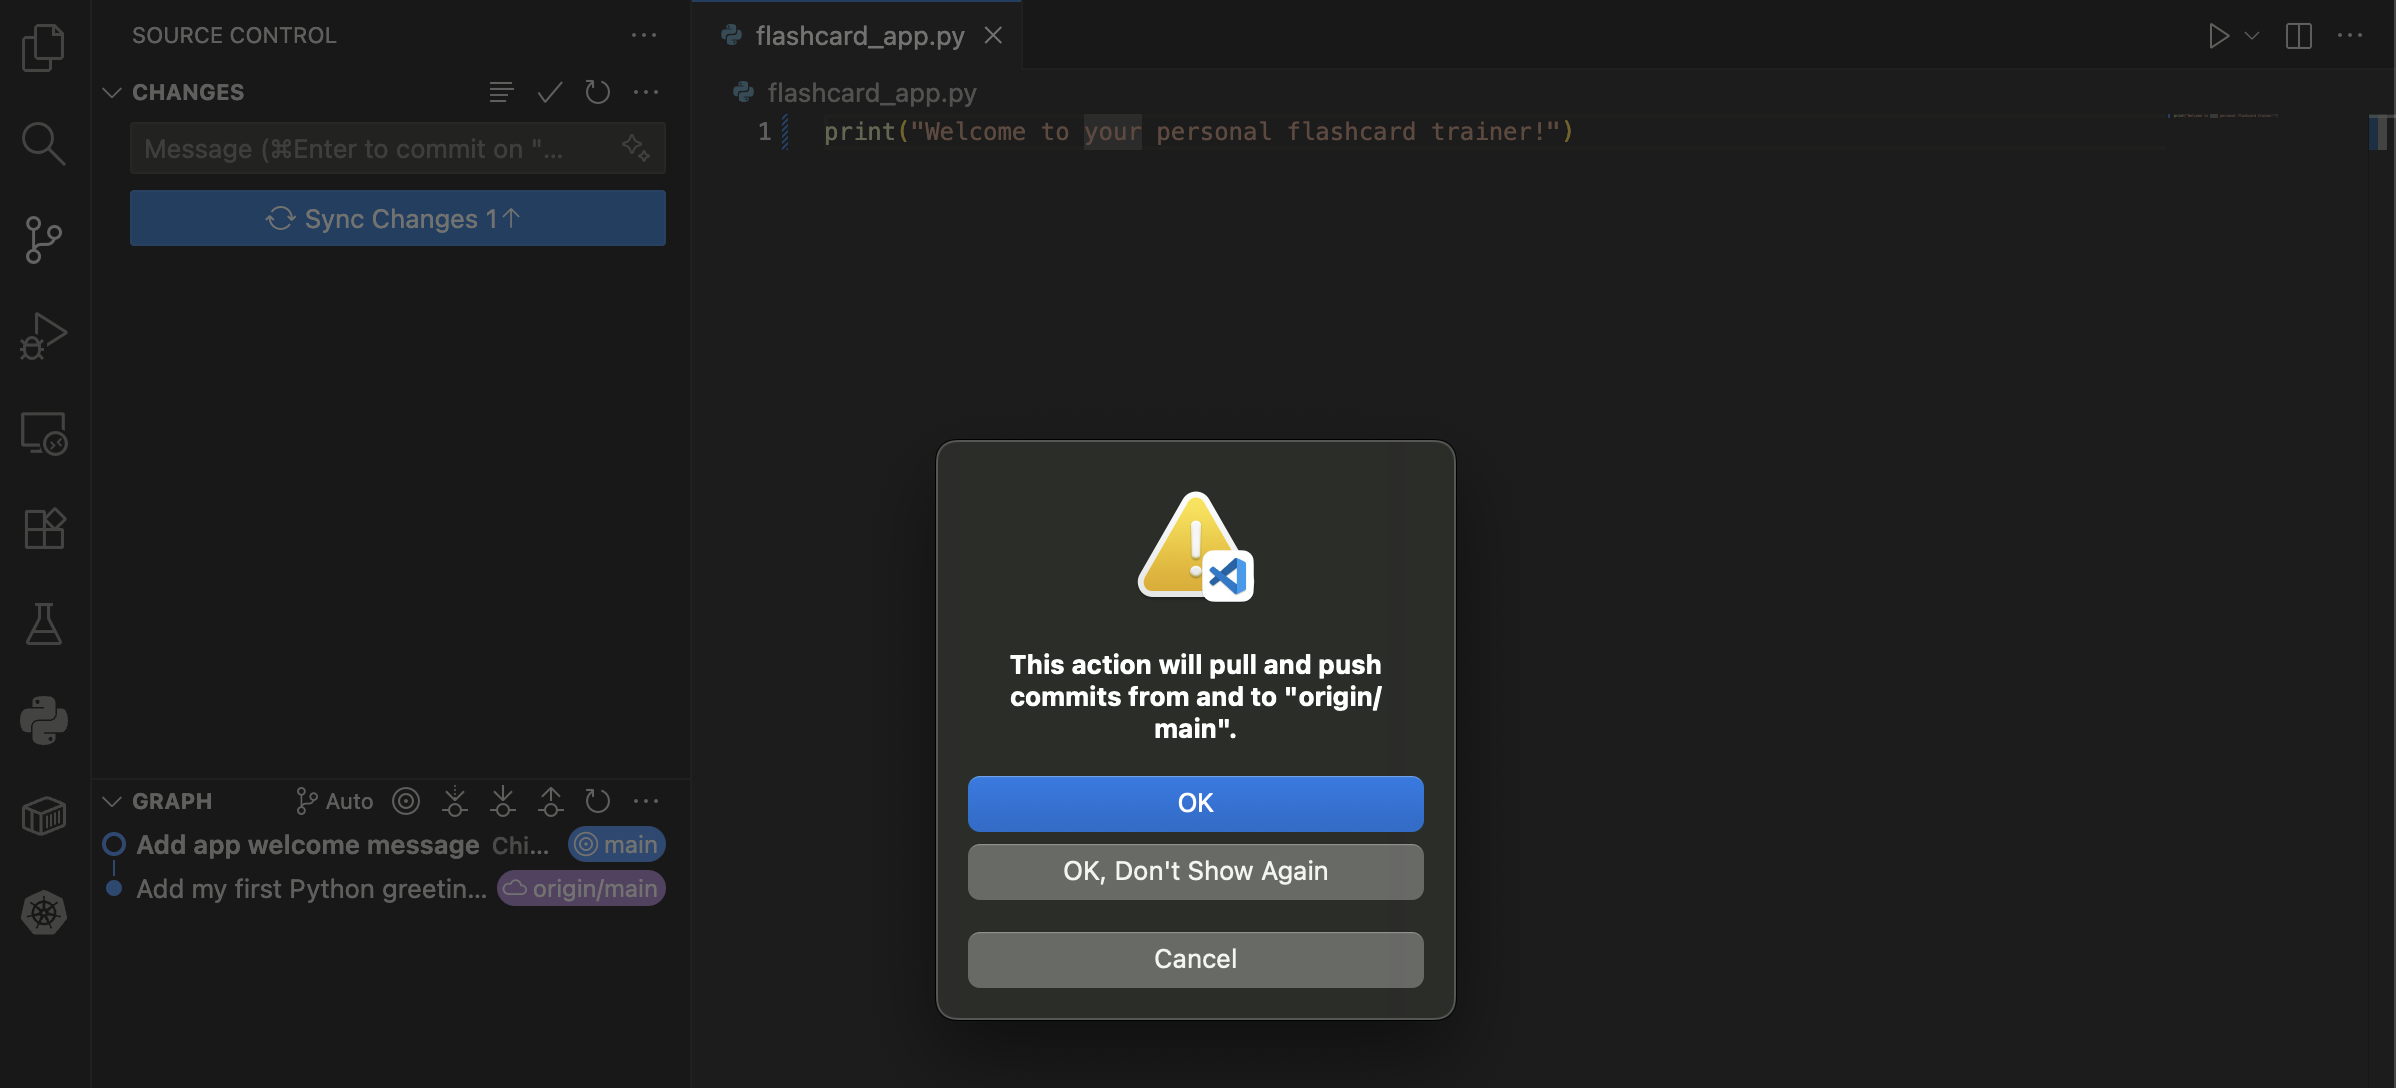
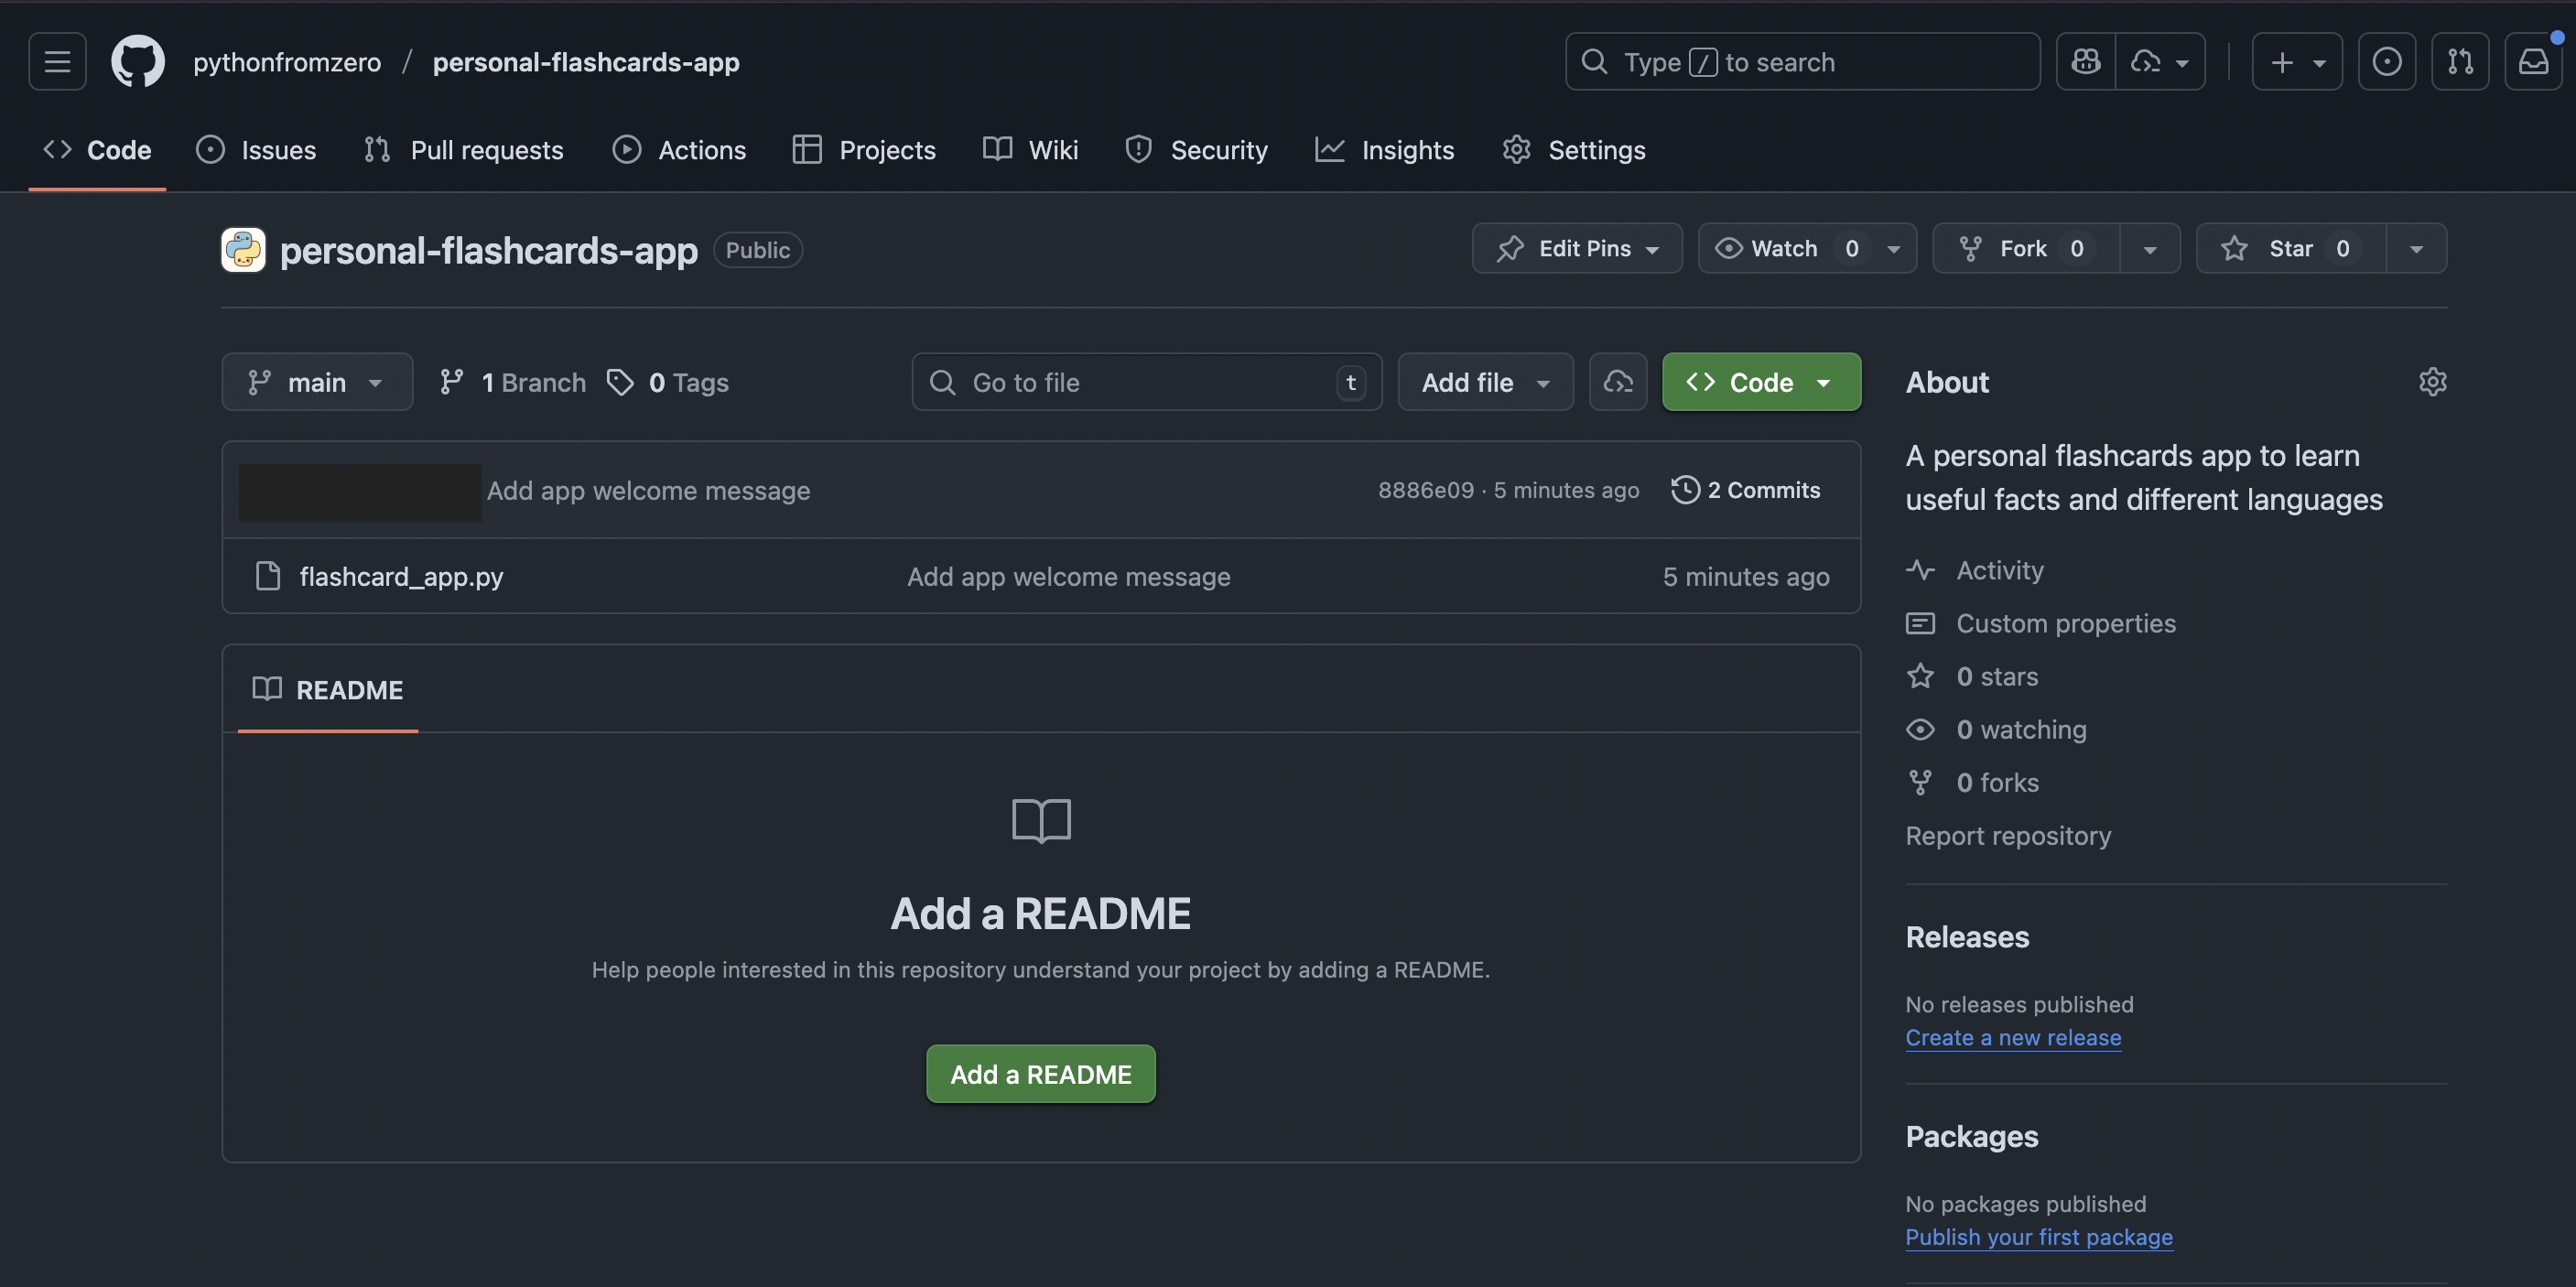
Your changes are now on GitHub! 🎉
Method 2: Using the Terminal
For those who prefer the command line or want more control.
Step 1: Save changes to your code
Save the files you have edited with [Ctrl+S] (Windows/Linux) or [Cmd+S] (Mac), as you would normally when saving files on your computer.
Step 2: Open Terminal in VS Code
- Press
Ctrl+`(backtick) or go to Terminal → New Terminal - Make sure you are in your project folder using the command
pwd
$ pwd
You should then see something like:
/Users/YourName/Documents/flashcard-app
The precise path depends on where you have put your project folder but make sure your project folder name is the last part of the path (in the above example, this is flashcard-app).
Step 3: Check which files have been changed
Use the command git status to check which files have changed
$ git status
You will then see a list of files that have been changed in either
- red, which means the changes have not yet been staged; or
- green, which means the changes have been changed.
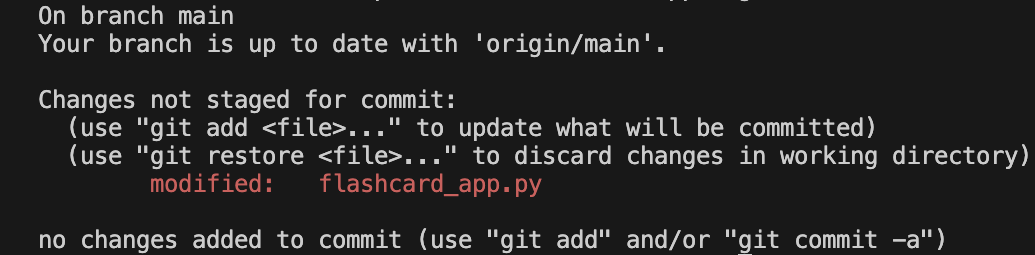
In this case there is only one file listed, which is not yet staged.
Step 4: Stage your changes
Option A: Stage all files
$ git add .
Option B: Stage specific files
$ git add greeting.py
$ git add homework.py
You can check if you have done this correctly by using the git status command again.
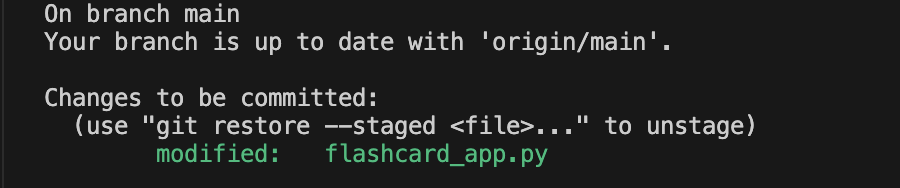
The file should now be staged and shown in green.
Step 5: Commit with a message
$ git commit -m "Add greeting function"
Step 6: Push to GitHub
$ git push origin main
Download latest changes from GitHub
Sometimes you need to download the latest version of your project from GitHub, for example when you want to work on your project on a different computer or if you are collaborating with someone else and want to download their edits.
The git pull Command
git pull origin main
This command downloads the latest commits to the project from GitHub and merges them with your local files.
Working on different computers
If you are working on different computers, it is good practice to first pull the project before you start working on it so you are sure you are working from the latest version.
You should make sure you adopt the following workflow to avoid getting a conflict:
1) pull the latest changes
$ git pull origin main
2) Make your changes and save
3) Stage, commit and push your changes (as you would do normally)
$ git add .
$ git commit -m "a descriptive commit message"
$ git push origin main
Resolving conflicts
When you have unsaved changes which conflict with the GitHub version you are pulling, you will see an error message
Problem: “Your local changes would be overwritten by merge”
Error message when pulling:
error: Your local changes to the following files would be overwritten by merge:
        flashcard_app.py
Please commit your changes or stash them before you merge.
You then have two options:
Option 1: Save your changes first then merge
git add . # Save and stage your changes
git commit -m "Work in progress" # Commit your changes
git pull origin main # Merge with the GitHub version
This pulls in the changes from the version in GitHub and tries to merge them with your local version. If there are conflicts, Git will ask you which lines to keep.
Option 2: Temporarily store changes, download the GitHub version, then restore your changes
$ git stash # Temporarily store local changes
$ git pull origin main # download the GitHub version
$ git stash pop  # Restore your changes
This pulls in the changes from the version in GitHub and then applies your changes on top. Again, if there are conflicts, Git will ask you how to resolve them.
Pulling and discarding your local changes
There may be some circumstances in which you want to completely discard the local changes and simply pull in the latest version from GitHub (e.g. if you have just been experimenting with some code but don’t want to keep it). In this case, you can discard your local changes.
You can discard changes to a specific file
$ git checkout -- flashcard_app.py
Or you can discard all local changes
$ git reset --hard
$ git pull origin main
Workflow after an exercise
git add .
git commit -m "Exercise A: Complete setup exercises"
git push origin main
Or in VS Code:
- Stage all changes (click + next to “Changes”)
- Message: “Exercise A: Complete setup exercises”
- Commit (Ctrl+Enter)
- Push (click … → Push)
Troubleshooting
Problem: “No changes detected”
Cause: You forgot to save your file
Solution:
- Press
Ctrl+S/Cmd+Sto save the file first - Look for a white dot on the file tab - that means unsaved changes
Problem: “Please tell me who you are”
Cause:
Git doesn’t know your name/email
Solution:
Run these commands in terminal:
git config --global user.name "Your Name"
git config --global user.email "your.email@example.com"
Problem: “Failed to push - rejected”
Cause:
GitHub has changes you don’t have locally
Solution:
Download changes from GitHub first
$ git pull origin main
Then push your changes
$ git push origin main
Problem: “Authentication failed”
Cause:
GitHub needs permission to access your account
Solution:
Use a Personal Access Token:
- Go to GitHub.com → Settings → Developer Settings → Personal Access Tokens
- Generate new token (classic)
- Select
repopermissions - Copy the token
- Use it as your password when VS Code asks
Problem: Merge conflict
Cause:
You and GitHub have different versions of the same file
Solution:
- VS Code will highlight conflicts in your file
- You’ll see options:
- “Accept Current Change”
- “Accept Incoming Change”
- “Accept Both”
- Choose which version to keep
- Save, stage, commit, and push
Problem: “Your local changes would be overwritten by merge” when pulling
error: Your local changes to the following files would be overwritten by merge:
        flashcard_app.py
Please commit your changes or stash them before you merge.

**Cause:**
You have unsaved changes that conflict with GitHub's version

Solution:
```bash
# Option 1: Save your changes first
$ git add .
$ git commit -m "Work in progress"
$ git pull origin main

# Option 2: Temporarily store changes
$ git stash
$ git pull origin main
$ git stash pop  # Restore your changes
Quick Reference
VS Code shortcuts
| Action | Shortcut |
|---|---|
| Open Source Control | Ctrl+Shift+G / Cmd+Shift+G |
| Open Terminal | Ctrl+` |
| Save File | Ctrl+S / Cmd+S |
| Commit | Ctrl+Enter / Cmd+Enter |
Git commands
# Post exercise workflow
git status              # What changed?
git add .               # Stage everything
git commit -m "message" # Save snapshot
git push origin main    # Upload to GitHub

# Getting Updates
git pull origin main    # Download from GitHub

# Checking History
git log                 # See past commits
git log --oneline       # Compact view
Summary
Every time you finish working:
- ✅ Save your files (
Ctrl+S) - ✅ Stage changes (click + in Source Control)
- ✅ Commit with a clear message
- ✅ Push to GitHub
You can also do this in terminal:
git add .
git commit -m "Describe your changes"
git push origin main